Guitar Tip: When & How to Adjust Your Truss Rod
- The Tone Ranger
- Guitar neck , Trussrod adjustmnet , Guitar maintanence
- January 4, 2022
The truss rod balances the forces acting on your guitar’s neck, ensuring optimal playability. By learning to adjust the truss rod yourself, you ensure smooth action, accurate intonation, and overall enhanced playing experience.
A Word of Caution
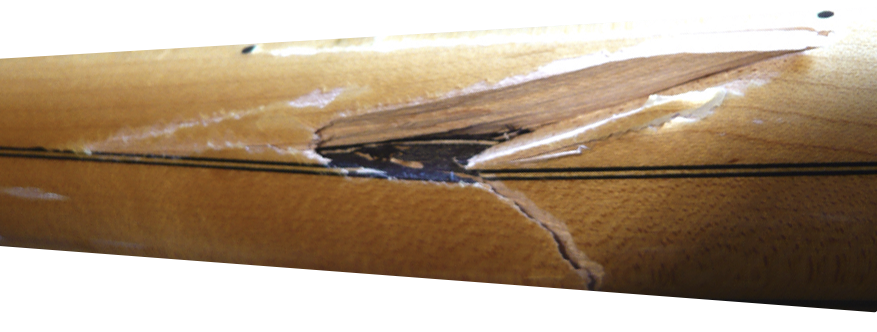
Truss rods are powerful, and over-tightening can damage your guitar beyond repair. While snapping a guitar neck by overtightening a truss rod is rare, it’s not unheard of. When it happens, it can be dangerous due to flying wood splinters and fret fragments.
Never practice on an expensive guitar. If you’re unsure, consult a professional luthier first.
When to Adjust
Keep an ear and eye out for these signs that your truss rod needs some attention:
- String buzz: Buzzing frets are often a symptom of a bowed neck, which can be corrected with a slight truss rod adjustment.
- Action woes: High action, where the strings are too far from the fretboard, can be improved by tightening the rod for a flatter neck.
- Seasonal shifts: Temperature and humidity changes can affect your neck, so a minor adjustment might be needed throughout the year.
How to Adjust
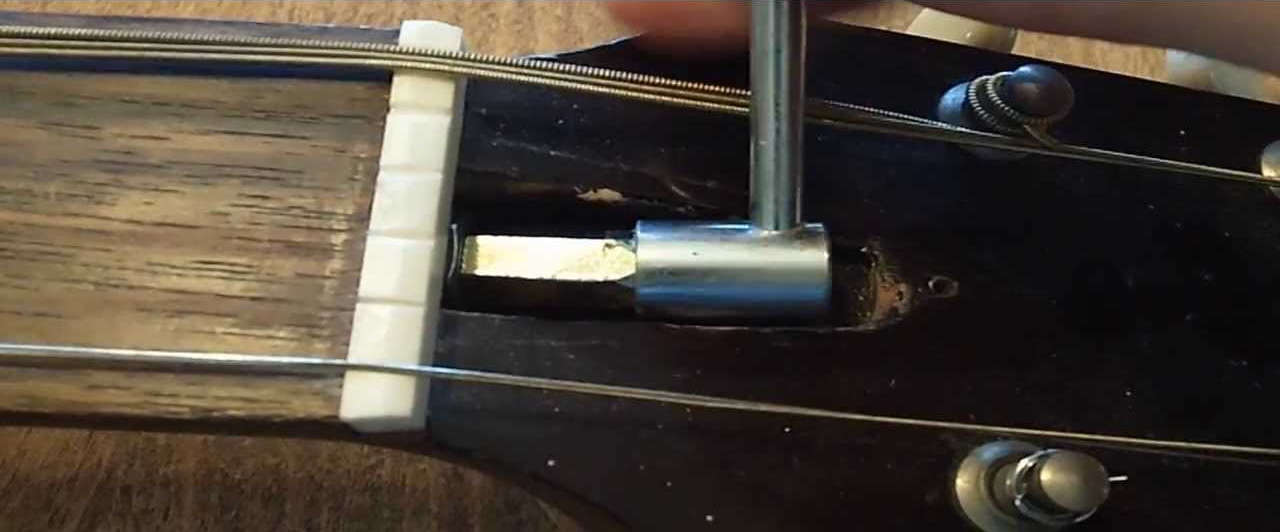
- Locate the access point: On most guitars, you will need to remove the truss rod cover plate on the headstock and carefully remove the tiny screws.
- Find the right tool: Usually, you’ll need a hex key that fits the truss rod nut snugly. Avoid using the wrong size, as it can damage the socket, especially on older guitars.
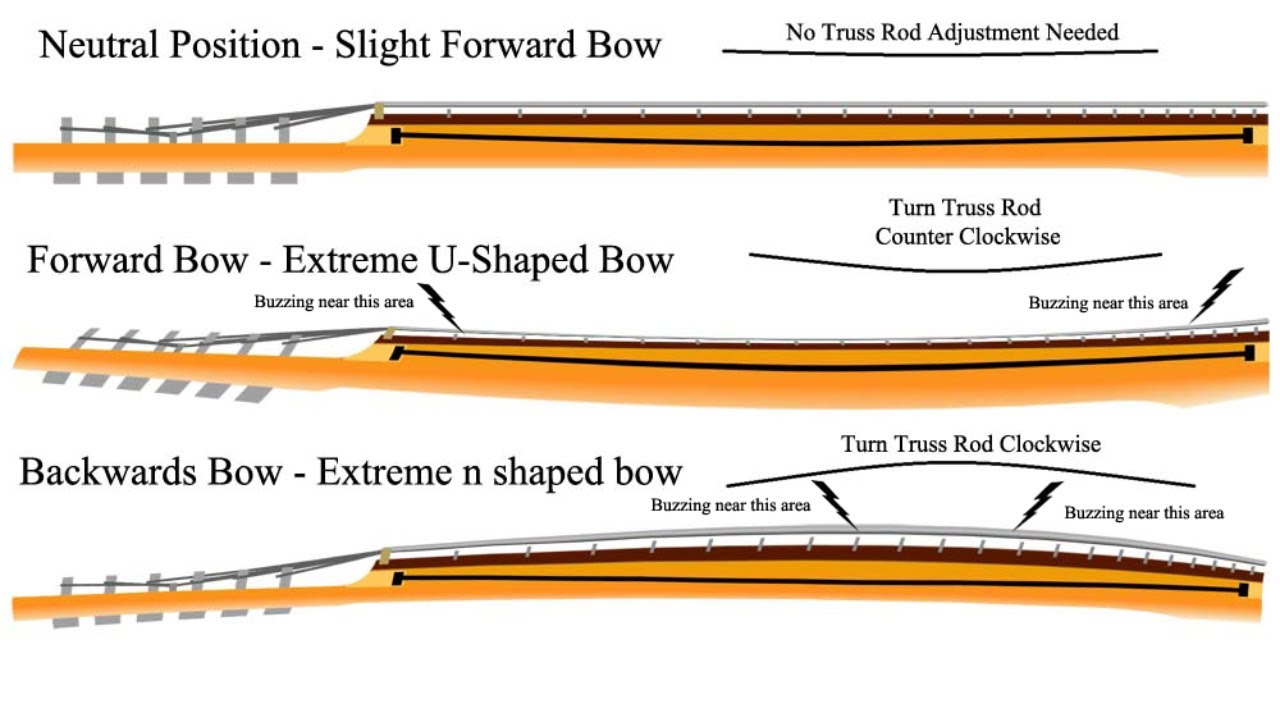
- Check the neck relief: Hold down a string at the first fret and another at the body end of the neck. Look at the clearance between the string and the top of the fret in the middle. Ideally, there should be around 1mm of space. Refer to the illustration below for guidance on which way to turn.
- Make small adjustments: Turn the truss rod nut in quarter-turn increments, tightening it if there’s too much clearance and loosening it if there’s not enough. Allow a few minutes between adjustments for the neck to settle. If you hear creaking, you’re forcing things and should back off.
- Finally, after each adjustment, recheck the neck relief and string playability. Stop when you achieve the desired action and minimal buzz.
Bonus Tips
- Fret wear can also cause buzzing. Before adjusting the truss rod, use a fret rocker to check for uneven frets.
- Take pictures: Document the starting position of the truss rod and neck relief before making any adjustments, making it easier to return to your original settings if needed.
- Start slow and seek help: If you’re unsure about anything, consult a guitar tech or luthier for guidance.